Way back in 2011 I was slagging it off, amazed that it had climbed to USD3.50. I should have made a substantial investment then but that is the benefit of hindsight. Now, the price is approaching AUD4000 each!
I bought a few back in 2012 but no where near as many as I should have…..
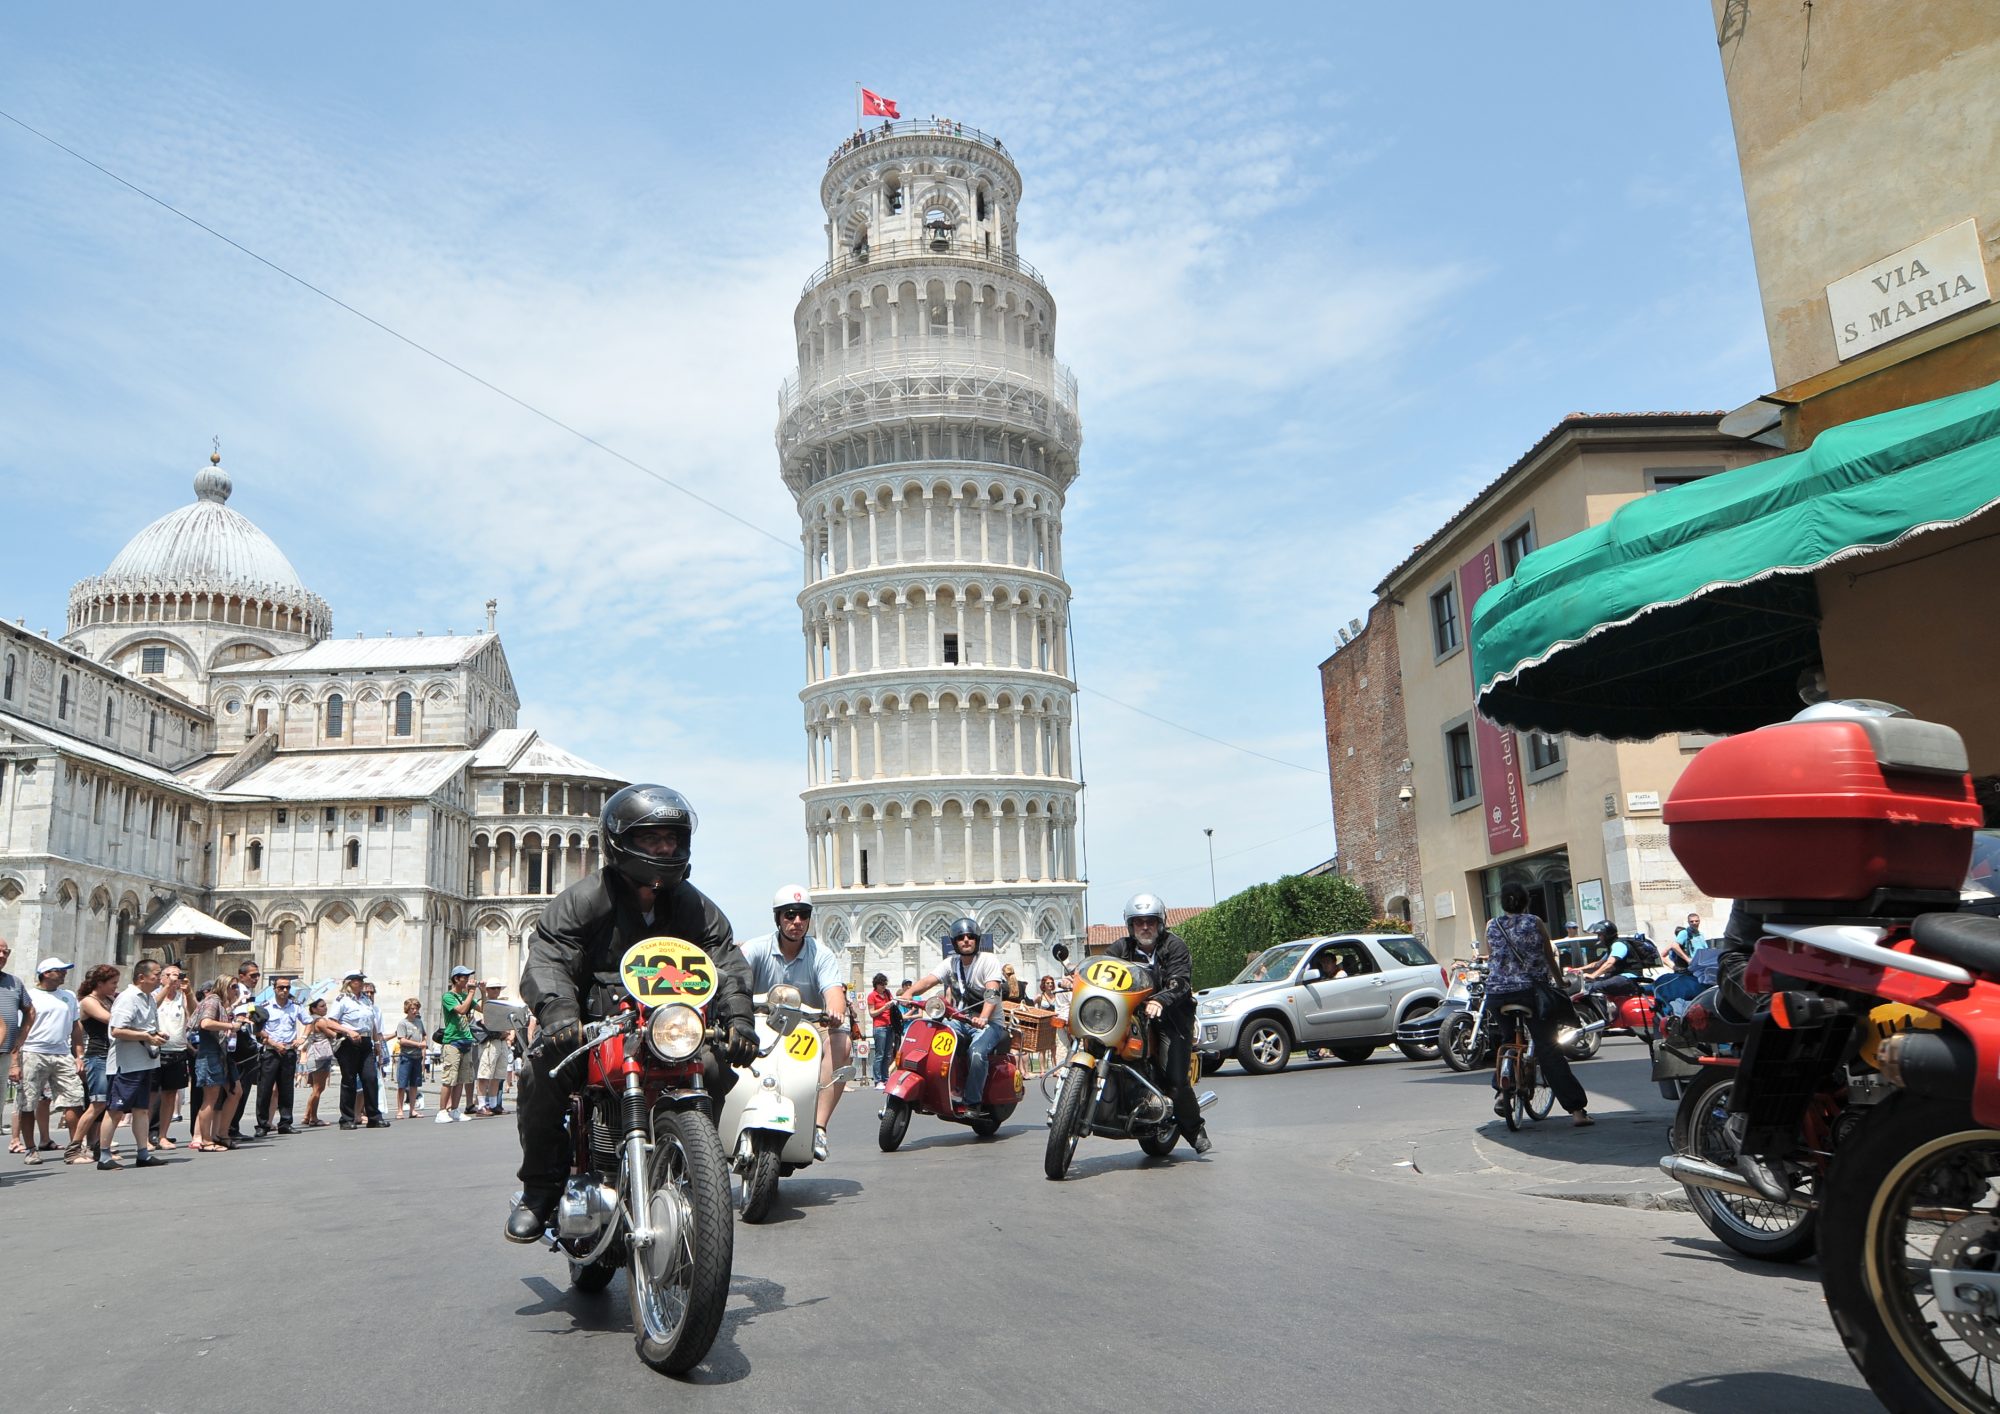
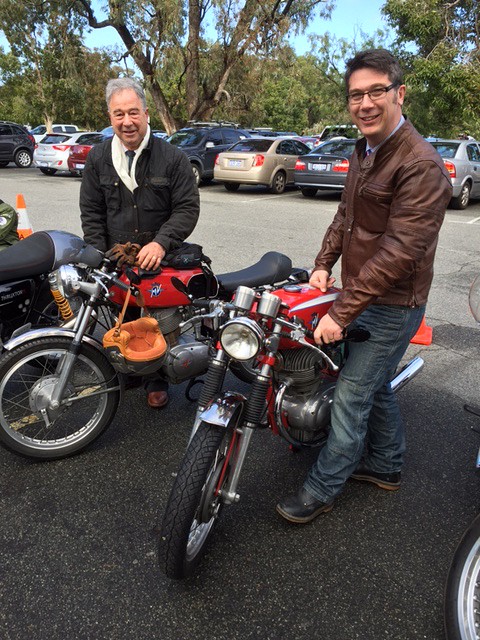
We went for a ride on our MV’s today. Ron’s was fine, mine didn’t get to the actual start. It was the 2016 Distinguished Gentlemen’s Ride.
Here is a pic of us both at the on the way to the start line in Kings Park, the start was in City Beach.
Didn’t make it much further for me.
Electrical issues again; bike stopped in Subi and then, after I decided to carry on again, in Perry Lakes. It wasn’t raining when I broke down so all good but bike recovery services are always expensive on a Sunday. I suggested to the recovery driver that he should hang around the ride today, about 1000 bikes means at least 1 more will break down.
Turns out the 350B isn’t charging. I rode to Kings Park with lights on which drained battery.
There is a 4 days MTB ride here in WA called the Cape to Cape. I have entered to ride it this year, should be a hoot with 4 days of off road riding of about 60km per day. Have been considering a multi-day event for some time and I recon this will be a great introduction.
Fortunately I have a cousin that lives down that way that I will be able to stay with during the time there. – I dare say I won;t be much company, likely to fall asleep by pm each night but we’ll see how we go.
It starts in about a month, better start riding some more km!
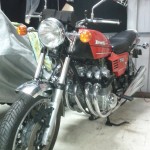
Saturday afternoon I took the Benelli Sei for a road test for about 20 minutes.
It ran well without any problems mechanically, however, electrical system didn’t cope well with a poor battery. Looks like the battery is failing and needs replacement after 18 months of little use and not being trickle charged continuously.
Number 2 cylinder smoke settled right down by the end of the run which is great news.
Now I just need to find a service station that has an air hose that will actually fit the valve on the wheel – after trying 5 service stations on the run none of them will fit.
Last night we installed the various crankcase breather pipes, coils, 6 spark plugs, the 6 magnificent exhaust pipes, installed the fuel tank and filled it up. The battery was a bit low so when the cranking started to slow down a bit I kicked it over using the kick starter. Two prods and off it went.
It seems to runs well so far. Less smoke now from all the cylinders all though number 2 started to get a little more smokey than the rest after a few minutes running – I’m guessing (actually I hope) that it should settle down once the rings bed in and the oil burns out of the exhaust pipes that exists from before rebuild.
Pics as always and a little video as a treat. Sounds is average as its from my mobile phone but you get the general idea.
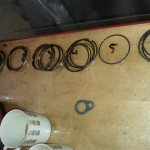
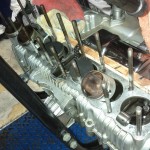
Notice the various styles of oil rings in used in the engine prior to our rebuild. Not sure why they installed all these different styles of oil-rings but some of them didn’t do the job.
I’ll take it for a spin this weekend and see how it runs.
The long weekend meant I didn’t have to stay up till some crazy hour of the morning to continue the build. The draw-back is I turned 40 and it was the first hot day of the summer (well Spring now but at 34c it may as well be summer).
Started early to try and finish the engine completely by 5pm – we didn’t get there.
Fitted the inner 4 pistons into their cylinders easy enough using the special tool but 1 and 6 continued to be a problem. Hand fitted top and middle rings on piston 1 and 6 but the oil rings are both relatively brittle and very hard to compress (with their inner spring) so hand fitting them was not an option. We ended up using the humble stainless steel hose clamp which was narrow enough (but only just) to compress just the oil ring and allow the cylinder to come down over the piston and the oil ring and allow the removal of the clamp again. When I mean the clamp width just allowed the fitting of the final piston oil ring I mean just, if they were another millimeter wider there would not have been enough room to get piston into cylinder by dropping the cylinder block down on it. I’m sure you are asking yourself – why didn’t the fool just push the piston up into the cylinder by turning the crank? The problem is if you turn the crank to push the piston up into the cylinder pistons 3 and 4 will come back out of their cylinder resulting in a complete re-do of everything and a lot of swearing. After about 2 hours work the pistons and cylinder block were finally finished. If you are doing this job you need to keep in mind that the pistons will rock about a little in the cylinder while the pistons skirt isn’t available to keep it upright – this adds to the fun.
As we installed new cylinder O-rings (they fit over the base of the cylinders that poke into the crank case and seal the crank case to the cylinder block as well as a gasket) the cylinder block did not go all the way down but instead sat above the crank case by about 1 mm – this is due to the o-rings, its not till you torque the head will you compress the O-rings and allow a good fit.
On with the cylinder head, new head gasket and oil rings that continues the oil gallery running up to the head – there is no hollow dowel here continuing the oil gallery from the cylinder block to the head – just a bloody o-ring – why they didn’t fit a hollow dowel I can not understand. After torquing everything down with our old school torque wrench both the cylinder block and the head beaded down fine, however, the head gasket split right on the end of the head next to cylinder number 1 where the newly installed o-ring allows oil to continue up to the valves and cam. What I am thinking is that the oil ring expanded when the head was tightened and as it is contained within the head gasket its pulled it apart a bit. We pushed a bit of red goo into the section where the gap formed between head and cylinder block just in case. There is no knowing if the damage to the gasket is going to cause an oil leak or not till we start it up – i’m thinking we should be good but engines don’t think – they just do. I can’t see they split running all the way to the #1 piston and given each cylinder has a metal reinforced ring part to the gasket there shouldn’t be a problem with # 1 but again – engines will do what they do.
Next step was fitting the cam shaft and sprocket – this is a complete pain in the ass. The crank drives the cam chain which in turn drives the cam sprocket which is bolted to the cam makes it turn, however, the cam must be timed relative to the crankshaft so the valves open and close at the right time to let petrol and air in and let exhaust out, but, at just the right time to prevent valves being smashed by the pistons. Fitting of the cam shaft is from the right had side, first through the chain then through the cam drive sprocket. The cam sprocket has two cut outs which allows the sprocket to drop down just barely enough for you to wiggle the cam chain onto its teeth (and I mean just enough). The issue now is that the crank needs to be in a particular spot as does the cam shaft, however, the cam sprocket can not bolt straight onto the cam shaft in the position its was in when we were able to put the chain on – oh no, that would make life easy, its 20 degrees away from there. As there are only 3 holes in the cam sprocket available for you to bold it onto the cam, the cam sprocket must be fitted onto the chain in just such a way as to have one of the holes in it line up with the one bolt hole in the cam and have the crank in the correct position and have the cam shaft in the correct position. Its a nightmare to get this right and requires you to take the chain off the sprocket, rotate the crank back enough to get the cam sprocket to match the cut out to the top of the cam that allows you to drop the chain off the sprocket to then calculate where the sprocket should be when mounted on the cam to then be bolted onto the cam and have cam and crank at the correct position together. This bit must have taken us about an hour and a half of trial an error before we had the chain on the correct teeth of the sprocket.
Now you can fit the cam box which has one huge O-ring as a gasket and around 30 hex-bolts to do up to complete it. The o-ring will fall out if you don’t use enough grease to stick it in. It was after this stage I found out we had set the crank in the wrong position relative to the cam by about 10 degree which translated to 20 degrees at the crankshaft as you turn it which resulted in the slow turn of the engine (after finally fitting the cam box) was meet with a sudden stop when valve contacted piston, however, it was a very gentle slow hand rotation for just such a reason. Off with the cam box, remove both cam sprocket retaining bolts, drop sprocket and re-time again to the correct spot again then put cam box back on etc etc. By now we had gotten a little quicker at this puzzle so it only took 40 mins. By 6pm we were done and the engine rotated freely. We tested the compression in each of the pistons using the starter motor 125 psi each which confirmed no damage done to the valves or issues (at this stage) with the split head gasket.
Now all there is to do is bolt on the engine breather (sits on to of the cam box), insert the exhausts, hook up fuel, re-fit coils and fire up!
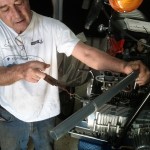
Our trusty torque wrech didn’t fit the socket set that was long and slim enough to fit down the holes in the head to get to the head nuts Take a leaver 1 foot long (from socket centre) to the piece of wire that we attached an old scale onto and pull to the required poundage!
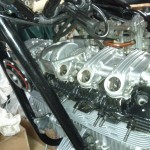
Head is now on after piston fitting
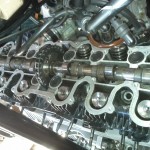
Here is the cam fitted on the head and awaing the cam box which containes the rockers.
Not sure if this was before or after timing “issues”
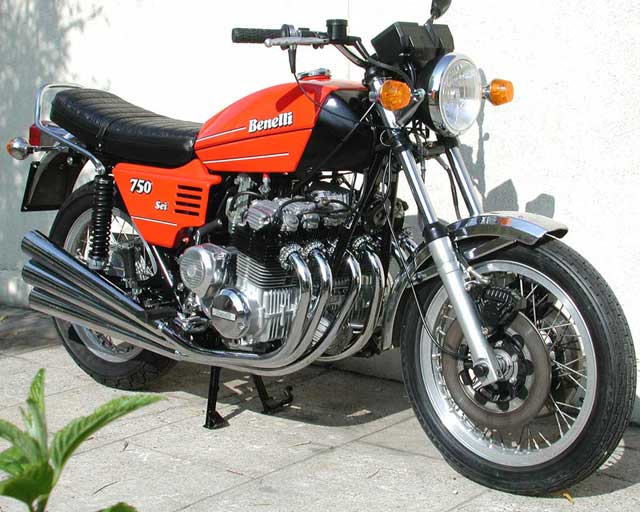
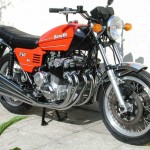
My father and I have a few 70’s Italian motorbikes, one of which is this 1973 Benelli 750 Sei. Sei in Italian means six – the bike has a straight six cylinder engine with accompanying 6 exhaust pipe – its madness – hideously over engineered but at its heart it is very similar to a Honda 750 from the same era but with an extra 2 cylinders.
We have owned it for about 4 years, bought it not really running and unregistered. Registration of it was a bit of a drama but it was eventually achieved, however, it has always smoked from number 1 cylinder (the left hand side one).
We pulled the head off about 3 years ago thinking it was valve stem seals or something at the top of the engine leaking oil – replacing of all valve guide seals and a new head gasket didn’t fix it and it got progressively worse so that now 1,2 and 6 are blowing smoke.
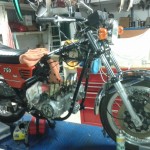
There was nothing else for it but to pull the thing apart again so about 3 years after the first pull apart off we go again.
Its turns out the piston rings, in particular the oil rings, were all odd styles and were not doing their job, of the 6 pistons there was about 4 different oil rings being used, 3 of which were not tight enough in the bore to do anything really and one of which was badly damaged – no wonder it blew smoke like a two-stroker.
The problem with having such an obscure bike is that the suppliers of parts are fairly limited so it was http://www.benelliparts.de to the rescue with a new set of piston rings, head and base gaskets and various o-rings that we may as well replace while we have it open. We also purchased a tool that compresses the piston rings so that they will slide into the bore.
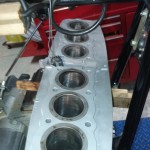
After having the barrels honed and the whole cylinder block bead blasted it was time to put the new rings on and “try” to get the 6 pistons into their cylinders. To say it is a little fiddly is an understatement. There are 6 cylinders, all at various heights going into a cylinder block that is one piece.
After about 2.5 hours of fiddling we had managed to get cylinder 2, 3,4 and 5, however, 1 and 6, because of the clearance between the bottom of the barrel and the top of the crank case, were much more difficult they need to go up into the cylinder but to do so required the rotation of the crank which resulted in pistons 3 & 4 coming out of the bottom of the cylinder so in the end at 1:30 in the morning we called it a night and decided to take the cylinder block off again and start again another day. Never mind, nothing broken at least which is the biggest problem with things like this when you are frustrated and tired.
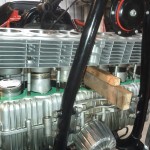
Engineering madness on two wheel
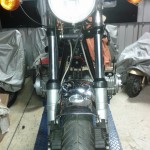
The engine hangs out either side of the bike, in fact your feet are in behind the engine when riding
Looks a bit of a mess doesn’t it but she’ll come back.
Cylinder block removed. Renato pulled the number one piston off for measuring
Step one of fitting the cylinder block, get it back on the engine with the timing chain through the middle.
See home each piston needs to go into each of their bores but the problem is the tool we are using to compress the rings didn’t help putting in cylinders 1 and 6 (the outer two) but we will try it again this weekend.