DD-WRT on Asus N66U version B2

I have recently started to work from home – its great but you need a rock solid connection to the net.  I’m on a wireless connection in my office and every time someone turned the microwave on the connection dropped out – very annoying for the 2 months it took me to figure it out.

I have been using a really old WRT-54G wifi router for about 5 years, running dd-wrt.  These units are getting very old, especially as the one I have are v1 and v2 units, I recon they must be about 10 years old.  They were very good in their day but they run on 2.4Ghz band so microwaves can be an issue so I lashed out an bought the current best WIFI router – the ASUS N66U.

n66u

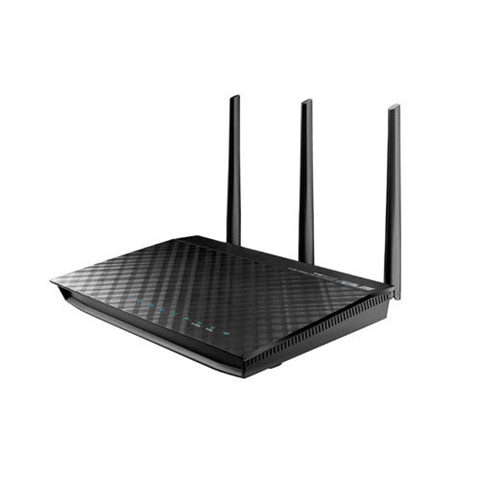
Its a pretty mean looking unit and by all accounts a clanger of a WIFI router but my home network has my m0n0wall router assigning IP address to the LAN (both wired and wifi).  I needed a wifi router firmware that supported forwarding the DHCP function to my m0n0wall router and as a result the ASUS stock firmware wasn’t going to cut it (or at least not that I could find) and so I needed to load the N66U with dd-wrt as well.

I bought the N66U about 3 weeks ago, read about getting dd-wrt on it and it looked pretty straight forward.  What I didn’t realise is that the unit I purchased was hardware version B2.

I tried installing brainslayers dd-wrt.v24-21676_NEWD-2_K3.x_mega_RT-N66U but it resulted in a boot loop, which isn’t good, so I flashed the stock firmware back on it by accessing the units recovery mode (you hold down the reset button while you power on the machine and then point your browser to it on 192.168.1.1 in case you wonder how you put it into recovery mode) and then put the unit back in the box for a week or so while I read a bit more about the various frimwares available and the issues people have faced.

Flashing of version B2’s is fairly thin on the ground at the moment so here is what I ended up doing.

Using the stock ASUS firmware I chose the upgrade firmware option in the web interface and upgraded to Merlins firmware which looks a lot like ASUS firmware but with a few tweaks, one of which is that you can see what version CFE is installed on the your N66U,  it also gets you ssh access to the router.  The CFE version on my brand new unit – built in 2013 was 1.0.1.0 which may explain why dd-wrt.v24-21676_NEWD-2_K3.x_mega_RT-N66U wouldn’t flash properly.

The majority of noise around the net on this unit is that you needed CFE boot loader 1.0.1.2 or 1.0.1.3 to get the custom firmwares to flash and so I resolved I had to update my boot loader to 1.0.1.3 using the method set out here.

The CFE update script assumes you already have 1.0.1.2 and so you need to make some changes to the update script (cfe_update.sh) before you can run it.  Basically you need to extract the tar ball of the CFE updater you download, then with the cfe_update.sh file you find and replace anywhere it say 1.0.1.2 to 1.0.1.0.  Once this change has been made you need to copy the CFE update files to the N66U using what ever methods works for you – I used scp.  Once the 4 files needed are in the N66U you run the cfe_update script and update your CFE.  Make sure you back up a copy of the old CFE and a copy of the new CFE, again use what ever works for you to get it off the router, I used scp again.

OK, now that you have updated the CFE boot loader you can update to firmwares that are 64MB in size, you must not flash a 32MB firmware from now on.

At first I flashed brainslayers dd-wrt.v24-21676_NEWD-2_K3.x_mega_RT-N66U however this started having some issues after a little while and so I changed firmware to Fractal’s 64K dd-wrt build which can be found here.

Of course you must do the 30-30-30 NVRAM clearing before and after each firmware flash (apparently).

The firmware has so far been running fine but, my microwave issue has not been solved.  I failed to note that the laptop I used for work doesn’t support 5Ghz WIFI so all I have gained is some experience with hacking the N66U – others on my network will no doubt enjoy the increased speeds as their machines support 5Ghz 🙁

Thanks to the following forums and links in getting me to this stage.

http://forums.smallnetbuilder.com/showthread.php?t=8259

http://www.dd-wrt.com/phpBB2/viewtopic.php?t=86437&postdays=0&postorder=asc&highlight=otrw+light&start=1860

http://charleswilkinson.co.uk/2012/12/22/dd-wrt-on-the-asus-rt-n66u-with-64k-cfe/


easyDNS

I just finished migrating my DNS service and domain name registrations to easyDNS.

I started the process a year or so ago and was going to move all my domains across at that time but stopped after I found that if you migrate away from my existing domain name registrar (cheapdomain.com.au) with time left on their registration you don’t get any $$ back. easyDNS seems to be a very professional and easy going registrar, no tricky contract or crappy interface, just easy domain registration.

They recently introduces a cheaper service (CAD$15) for people like me who don’t need all the bells and whistles that their old lowest service offered so I’m really happy. Whats more – they accept payment by Bitcoin as well! When my next domain comes up for renewal I’ll be going for that option I recon.

So, if you want a great domain registrar that doesn’t make you feel like you are dealing with some dodgy mob, go with eastDNS.

Bitcoin bubble part 2- why its no good.

Wow.

The bitcoin price over the last month or so has really gone crazy, as of today its up around $43USD/BTC. It’s hard to understand why it is so high given not a great deal has changed (other than the halving of the mining reward late last year and perhaps a little wider adoption)from when it was just under USD3 in November 2011 after its crash from previous highs around $30/BTC.

A bit unsustainable but good for those who bought some and kept them when they were much cheaper (if they intend on converting back to their home currency).

At the end of the day it really doesn’t matter what the price of a BTC is if its main purpose turns into being the “transport medium” of wealth from one individual to another, it is merely the conduit by which value is exchanged. If they are USD100 each or USD1 each it will only mean that the person sending the $$$ to someone else needs to buy more or less of them. The problem with this wild fluctuation in value is that the majority of people who want to buy to store value and to later exchange for goods or services in the medium term are likely to be to nervous to do so given its volatility and as a result the usage of bitcoin as a stored value and accordingly to be used as exchange for goods or services could be limited

Perhaps bitcoin will be relegated to just a short term transfer of wealth vehicle, quickly bought, sent to another wallet and then converted back into the local currency of the receiver before any swings in the exchange rate adversely impacts the recipient.

We will no doubt see soon what happens.

TunnFM

I’ve got many fond memories of JJJ radio in the early to mid 1990’s. Things were easier then, life was less complicated (a family and mortgage do that) and JJJ was the radio station I listened to.

One of the hosts was Michael Tunn, he hosted the Request Fest or something like that, he was very young. I vaguely recall him heading off to the UK to live for a little while and he rang in one night, apparently a little “under the weather”….

I stumbled across a site he has set up that plays just 1990’s music – I’ll have to have a listen and perhaps throw some BTC’s his way if its any good.

Benelli 750 Sei engine rebuild – Part 2

The long weekend meant I didn’t have to stay up till some crazy hour of the morning to continue the build.  The draw-back is I turned 40 and it was the first hot day of the summer (well Spring now but at 34c it may as well be summer).

Started early to try and finish the engine completely by 5pm – we didn’t get there.

Fitted the inner 4 pistons into their cylinders easy enough using the special tool but 1 and 6 continued to be a problem.  Hand fitted top and middle rings on piston 1 and 6 but the oil rings are both relatively brittle and very hard to compress (with their inner spring) so hand fitting them was not an option.  We ended up using the humble stainless steel hose clamp which was narrow enough (but only just) to compress just the oil ring and allow the cylinder to come down over the piston and the oil ring and allow the removal of the clamp again.  When I mean the clamp width just allowed the fitting of the final piston oil ring I mean just, if they were another millimeter wider there would not have been enough room to get piston into cylinder by dropping the cylinder block down on it.  I’m sure you are asking yourself – why didn’t the fool just push the piston up into the cylinder by turning the crank?  The problem is if you turn the crank to push the piston up into the cylinder pistons 3 and 4 will come back out of their cylinder resulting in a complete re-do of everything and a lot of swearing.  After about 2 hours work the pistons and cylinder block were finally finished.  If you are doing this job you need to keep in mind that the pistons will rock about a little in the cylinder while the pistons skirt isn’t available to keep it upright – this adds to the fun.

As we installed new cylinder O-rings (they fit over the base of the cylinders that poke into the crank case and seal the crank case to the cylinder block as well as a gasket) the cylinder block did not go all the way down but instead sat above the crank case by about 1 mm – this is due to the o-rings, its not till you torque the head will you compress the O-rings and allow a good fit.

On with the cylinder head, new head gasket and oil rings that continues the oil gallery running up to the head – there is no hollow dowel here continuing the oil gallery from the cylinder block to the head – just a bloody o-ring – why they didn’t fit a hollow dowel I can not understand.  After torquing everything down with our old school torque wrench both the cylinder block and the head beaded down fine, however, the head gasket split right on the end of the head next to cylinder number 1 where the newly installed o-ring allows oil to continue up to the valves and cam.  What I am thinking is that the oil ring expanded when the head was tightened and as it is contained within the head gasket its pulled it apart a bit.  We pushed a bit of red goo into the section where the gap formed between head and cylinder block just in case.  There is no knowing if the damage to the gasket is going to cause an oil leak or not till we start it up – i’m thinking we should be good but engines don’t think – they just do.  I can’t see they split running all the way to the #1 piston and given each cylinder has a metal reinforced ring part to the gasket there shouldn’t be a problem with # 1 but again – engines will do what they do. 

Next step was fitting the cam shaft and sprocket – this is a complete pain in the ass.  The crank drives the cam chain which in turn drives the cam sprocket which is bolted to the cam makes it turn, however, the cam must be timed relative to the crankshaft so the valves open and close at the right time to let petrol and air in and let exhaust out, but, at just the right time to prevent valves being smashed by the pistons.  Fitting of the cam shaft is from the right had side, first through the chain then through the cam drive sprocket.  The cam sprocket has two cut outs which allows the sprocket to drop down just barely enough for you to wiggle the cam chain onto its teeth (and I mean just enough).  The issue now is that the crank needs to be in a particular spot as does the cam shaft, however, the cam sprocket can not bolt straight onto the cam shaft in the position its was in when we were able to put the chain on – oh no, that would make life easy, its 20 degrees away from there.  As there are only 3 holes in the cam sprocket available for you to bold it onto the cam, the cam sprocket must be fitted onto the chain in just such a way as to have one of the holes in it line up with the one bolt hole in the cam and have the crank in the correct position and have the cam shaft in the correct position.  Its a nightmare to get this right and requires you to take the chain off the sprocket, rotate the crank back enough to get the cam sprocket to match the cut out to the top of the cam that allows you to drop the chain off the sprocket to then calculate where the sprocket should be when mounted on the cam to then be bolted onto the cam and have cam and crank at the correct position together.  This bit must have taken us about an hour and a half of trial an error before we had the chain on the correct teeth of the sprocket.

Now you can fit the cam box which has one huge O-ring as a gasket and around 30 hex-bolts to do up to complete it.  The o-ring will fall out if you don’t use enough grease to stick it in.  It was after this stage I found out we had set the crank in the wrong position relative to the cam by about 10 degree which translated to 20 degrees at the crankshaft as you turn it which resulted in the slow turn of the engine (after finally fitting the cam box) was meet with a sudden stop when valve contacted piston, however, it was a very gentle slow hand rotation for just such a reason.  Off with the cam box, remove both cam sprocket retaining bolts, drop sprocket and re-time again to the correct spot again then put cam box back on etc etc.  By now we had gotten a little quicker at this puzzle so it only took 40 mins.  By 6pm we were done and the engine rotated freely.  We tested the compression in each of the pistons using the starter motor 125 psi each which confirmed no damage done to the valves or issues (at this stage) with the split head gasket. 

Now all there is to do is bolt on the engine breather (sits on to of the cam box), insert the exhausts, hook up fuel, re-fit coils and fire up!

Google Wallet Update – Got it working

I messed about with my phone again tonight – I was bored.

I uninstalled the existing Wallet app and then side loaded another wallet app (in .apk format) from xda-developers.com.  Set market enabler to Verizon and was successfully able to start he app and creat a new Google Paypal card with $10 free.  Now, just need to figure out how to top up the card from Australia 🙁

By Martin De’Pannone

BMX Restoration

I’m kind of getting into restoring bicycles now days.

I “found” a mid school Mongoose BMX 6 months ago and thought it would be good for my 8 year old son.

I stripped it to bare frame, had it painted by my old man in metallic gold and am now building it back up after cleaning and polishing the bits I am keeping. Will be replacing several parts as well. Here is a snap of it as of yesterday.

Just a few more bits and a few more hours.

After restoring scooters and motorbikes bicycles are much easier and mush less complicated.

Google Wallet and outside of USA – don’t bother

I have been very interested in Google Wallet since it as announced but very disappointed that the roll out of the product appears to be very very slow with only a couple of devices supported.

Today I had had enough and in an effort to get the thing going for me here in Australia proceeded to do some “work” on my Nexus S that is now running ICS 4.0.4.

Step 1
Get Wallet installed on the phone.
There is a way you can get it on your phone without side loading but geees is it involved and basically requires you to try loading it in the app stpre then somehow foolin the thing to get it by using the web browser. It all a bit long winded but it does work.

Step 2
Unlock the phone.
Using fastboot you must first “unlock” the booloader which has a couple of consequences not lest of which it wipes everything, data on SD card stprage – everything so mack sure you backup your apps and then back up the SD Storage to your PC as after unlocking its all gone. The other consequence is that it factory resets as well so you need to set the phone up again including APN if you are using non standard one.

Step 3
Again using Fastboot flash the TWRP reovery image. Which, among other things allows you to do the next step

Step 4
Install Superuser
Save Superuser to your phones storage and using TWRP while in recovery mode install/run the superuser script.

Step 5
Install Market enabler
This will allow you to spoof a US mobile carrier which then will allow you to start up Google Wallet butthis is where it get tricky.

The issue
To run Google Wallet you have to spook a US mobile carrier, to do this you need Market Enabler but to run market enabler you must root the phone and here is the issue, Google Wallet will not allow you to creat a Google Pre-Paid card using a device that has been rooted.

So there you go kiddies, rooting your phone to take advantage of Market Enabler almost gets you what you want but you are ultimatley thwarted by the fact that you have rooted your phone.

My advise – be patient and wait/see if Google Wallet is released to the massess – till then unless you are living in the USA it may be a waste of time, let along the issues you are likely to face to be able to associate aything but a USA credit card to the prepaid card.

If anyone has a more clever idea which gets around this whole issue let me know.