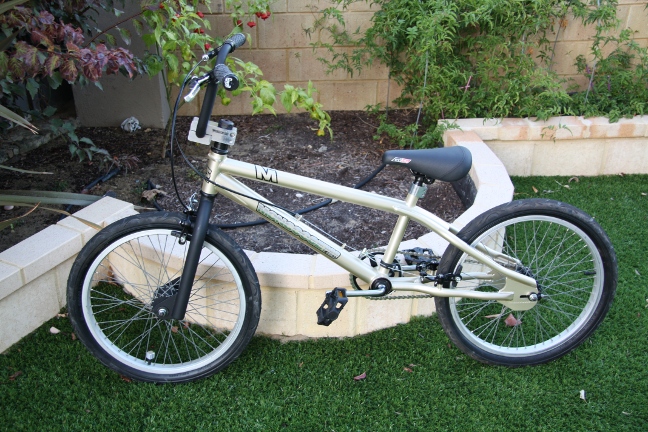
Mongoose Spin rebuild finished.

Well after about a month of getting bits and pieces, painting etc I have finished the rebuild of my sons Mongoose Pro BMX.  From the searching online I believe it started life as a Mongoose Pro Spin.

I’m really happy how it turned out.  I replace many old crappy bits with new ones and reconditioned the bits that were used again.  In all I replaced:-

  • Tires
  • Grips
  • Cables
  • Front and rear brakes (it had none when I got it) including levers.
  • Seat
  • Rear sprocket – larger one, to change gearing so its a little easier to pedal
  • Pedals
  • Chain
  • Crank
  • Stickers
  • New Two pack paint job thanks to my old man

Its a bit big for him in length but he’ll grow!

BMX Restoration

I’m kind of getting into restoring bicycles now days.

I “found” a mid school Mongoose BMX 6 months ago and thought it would be good for my 8 year old son.

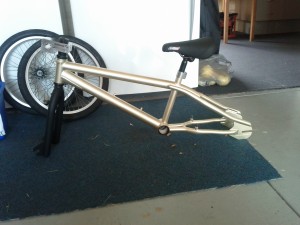
I stripped it to bare frame, had it painted by my old man in metallic gold and am now building it back up after cleaning and polishing the bits I am keeping. Will be replacing several parts as well. Here is a snap of it as of yesterday.

Just a few more bits and a few more hours.

After restoring scooters and motorbikes bicycles are much easier and mush less complicated.

Google Wallet and outside of USA – don’t bother

I have been very interested in Google Wallet since it as announced but very disappointed that the roll out of the product appears to be very very slow with only a couple of devices supported.

Today I had had enough and in an effort to get the thing going for me here in Australia proceeded to do some “work” on my Nexus S that is now running ICS 4.0.4.

Step 1
Get Wallet installed on the phone.
There is a way you can get it on your phone without side loading but geees is it involved and basically requires you to try loading it in the app stpre then somehow foolin the thing to get it by using the web browser. It all a bit long winded but it does work.

Step 2
Unlock the phone.
Using fastboot you must first “unlock” the booloader which has a couple of consequences not lest of which it wipes everything, data on SD card stprage – everything so mack sure you backup your apps and then back up the SD Storage to your PC as after unlocking its all gone. The other consequence is that it factory resets as well so you need to set the phone up again including APN if you are using non standard one.

Step 3
Again using Fastboot flash the TWRP reovery image. Which, among other things allows you to do the next step

Step 4
Install Superuser
Save Superuser to your phones storage and using TWRP while in recovery mode install/run the superuser script.

Step 5
Install Market enabler
This will allow you to spoof a US mobile carrier which then will allow you to start up Google Wallet butthis is where it get tricky.

The issue
To run Google Wallet you have to spook a US mobile carrier, to do this you need Market Enabler but to run market enabler you must root the phone and here is the issue, Google Wallet will not allow you to creat a Google Pre-Paid card using a device that has been rooted.

So there you go kiddies, rooting your phone to take advantage of Market Enabler almost gets you what you want but you are ultimatley thwarted by the fact that you have rooted your phone.

My advise – be patient and wait/see if Google Wallet is released to the massess – till then unless you are living in the USA it may be a waste of time, let along the issues you are likely to face to be able to associate aything but a USA credit card to the prepaid card.

If anyone has a more clever idea which gets around this whole issue let me know.

Started riding to work – need to get fit……

So I have done bugger all exercise now since I finished rowing in 2004, that’s 8 long years of doing stuff all.

I have been meaning to start doing something again for a few months and after getting sick and tired of the bus trips to work taking an hour (for a 14km journey) I though I may as well cycle to work.

Luckily a mate had a road bike he didn’t use, another mate lent me his cycling shoes and gave the bike a once over and so now, I have started to ride to work. This weeks the first week, its hard work but if I ride to and from work I’ll do close enough to 30km a day – that’s 150km a week if I ride every day. I’m guessing that doing this should have the desired effect of getting me fit and loosing the extra 5kg’s or so that I have slowly put on over the last 8 years.

I have installed a widget that displays my rides I upload to www.strava.com on this blog if any one cares to look.

Bitcoin needs to stop being a thing of specualtion.

Just read that Tradehill has closed its doors and that Paxum is no longer accepting Bitcoin funded accounts.

Wow! – I thought, I wonder how that has impacted prices as I have noticed that Bitcoin rate compared to the USD has risen fairly steadily over the last few months from its lows of about USD2. Looking at MtGox it looks like the exchange rate has softened 25% for the day ad is trading at about USD4.20.

Looks like the various policies recently being put in place to start controlling the use of Bitcoin is starting to bite (I was asked to ID myself before being able to use a particular exchange I had already used before).

My theory is that BTC will soon stop being a thing of speculation (and demand a premium because it is “l33t” or Anonymous) and will soon float with the USD at a price that reflects the cost of creation of bitcoins. Then and only then will Bitcoin become a currency/method of wealth transfer that will gain greater usage around the world.

Twitter’s Bootstrap frame work for webpages

Having recently moved all my services back to Australia after my from Amazon’s EC2 experiment I thought my old website needed a bit of a re-fresh so that I have one main page from which you can bounce around to all the other bits of my website – enter Twitter Bootstrap.

Now I am no website developer but this thing is very very simple to use. All I do is make sure I point the web page to the CSS code that resides at Twitters github repo and then just code the page using the bootstrap CSS elements e-voila and I created my home page (www.depannone.com). Dead easy and looks really really nice if I may say so.

If you are interested in using Twitters Bootstrap as well see here….http://twitter.github.com/bootstrap/

Move of web and mail servers are complete

I have finally transferred all my services back to Australia.

For a few months now I hosted my web and mail server at Amazon. Unless you use the micro instances and the limitation there of its just to expensive (for me) to justify keeping it at Amazon. Luckily a mate of mine has a huge ESX box and was kind enough to create a couple of machines on there for me so here we are, back in Oz.

The web interface to my emails in the past has always been Squirrelmail, its fast, easy and works but is lacking in the looks department. On my new mail server I have installed Roundcube. It looks nice and seems to work well but is a little slower than Squirrel – perhaps it needs some tweaking.

My new website web application.

You may notice there isn’t much of my old site left, just the wordpress blog. Now that I have commencing moving all my servers back to Australia (thanks Paul) I have cleaned up my website and installed a couple of open source services.

The first was tt-rss (tt-rss.org) which is a great little web application that you use to subscribe to rss feeds. RSS is a great thing if you like to keep tabs of new posts on a bunch of websites. I used to use Google Reader but thought it would be cool if I could own the information about which websites I subscribe to – hence tt-rss.

Second, I have always found it painful to create new pages for photos that we take on my old site, it was time consuming using something like Jalbum. To this end I have installed OpenPhoto on my website (see photos.depannone.com). Go to http://theopenphotoproject.org/ for more info. Its great – very flash and has the tagging facility which I never really considered until you sit down and think how do I find this picture again in a few years. For each photo you upload to it you can tag it with what the photo is about (say it has a photo of a dig, you would tag it “dog”) then in the future if you want to look at say photos of just dogs you can do so (assuming you have been diligent at your tagging in the first place).

The great thing about OpenPhoto is the photo’s don’t actually live on your server, when you upload them they are actually store at Amazon in one of the S3 buckets that you need to create (if you self host). Given all my photos are currently backed up to S3 this was fairly easy. If you don’t have S3 yet – sign up at Amazon, create a bucket for your photos and enjoy owning and staying in control of all your photos.

Two very cool web apps that you should check out of you run your own servers.

Moving away from EC2

Well, I’m getting off this EC2 ride and moving my servers back to Oz over the next few days.

Its been a wild ride and have learned heaps about the EC2 solution, its shortcomings and strengths. In all, I don’t think its an affordable solution for someone like me that just wants to host some machine images for serving websites etc. I’ll write more later, at the moment I moving house – so to speak.
h